As a man on a budget, I set out to build a quadcopter as affordably as possible. My two guiding design principles were keeping things cheap and keeping things light weight. Rather than designing and building something totally from scratch, I decided a customizable kit was a good option.
Selecting a frame kit was a slam dunk. The DJI Flamewheel kits are industry standard and there are build guides galore all over the web. My golden rule with projects is: A good support community is worth far more than fancy specs or a low price.
DJI offers a small (F350) and large (F450) quadcopter kit as well as a hexacopter (F550) kit. As my goal was to build a BIG Quadcopter, the F450 was selected. The kit comes with a frame with integrated power distribution PCB, motors, propellers (two sets), and Electronic Speed Controllers (ESCs).

DJI Flamewheel F450 ARF Kit
According to my research, I was still left to select the following items:
1) Flight Control Unit (FCU)
The FCU is the brain of the vehicle. It tells the motors (via the ESCs) to speed up or slow down in order to maintain level flight or execute commanded maneuvers. There are proprietary FCUs such as the NAZA system that are self contained and should work “out of the box”. These controllers are great for people who want a simpler, “it just works” type of experience. There are also open source FCUs such as the MultiWii controllers and fancier Pixhawk systems. If you desire customization and have coding skills and tinkering time, this is an attractive option.
According to my guiding principles of cheap and light weight, I selected a MultiWii controller with integrated RF Receiver from Hobbyking. The board has a decent forum community and support, however documentation is poor.

- MINI MWC Flight Control Board and DSM2 Receiver

NOTE: Special consideration needs to be made to ensure that the Pulse Width Modulation (PWM) frequency of the FCU is compatible with the ESCs. Many modern FCUs require PWM frequencies of 1kHz or greater. This gives the user great control and improves the flight characteristics of the craft. Many cheaper and/or older ESCs only handle PWM frequencies up to 400Hz. Furthermore, many manufacturers provide poor or no information regarding the PWM frequencies of their units. The FCU I selected runs open source MultiWii firmware that is coded to run at 488Hz. The ESCs that come with the Flamewheel ARF kits are only compatible up to 400Hz. In short, MultiWii systems are not compatible with the DJI ESCs out of the box. I learned this lesson the hard way and ended up having to rewrite one of the timers in the open source code to get my quadcopter flying properly. This cost me loads of time and was very painful. Learn from my mistake!
2) Radio Frequency (RF) Receiver
The RF Receiver is mounted to the aircraft and receives the control transmissions from the user’s control transmitter. The Receiver then passes them to the FCU. The receiver needs to support the communication protocol required by the FCU as well as the transmitter. I ended up buying an integrated FCU and receiver so I only had to worry about the transmitter. My receiver and transmitter utilize the DSM2 protocol which is well supported and popular.
3) Transmitter
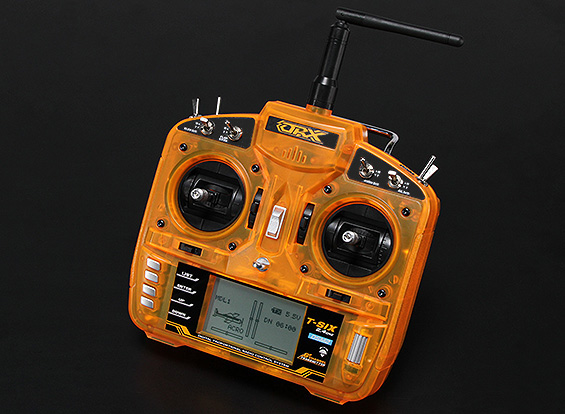
The transmitter is the actual handheld controller that is used to command the vehicle. Make sure you get something that is compatible with your receiver and promises good reliability, battery life and transmit range. I selected the OrangeRX T-SIX because of its low price and strong customer reviews. When selecting a transmitter, one must also consider how the transmitter sticks are configured: Mode 1 has throttle / yaw control on the right and pitch / roll control on the left; Mode 2 has throttle / yaw control on the left and pitch / roll control on the right. Last, ensure that the transmitter operates on the same frequency as the receiver–in my case 2.4GHz.

- Orange T-SIX Transmitter
4) Battery
The battery must provide power to the motors (via the ESCs) as well as sufficient power for all of the supporting electronics; also the battery cannot be too heavy as to prevent the craft from flying! The size of the battery affects flight time and I wanted to make sure that my craft had an endurance of at least ten minutes. The math here is quite smiple:
Flight Time (hours) = Battery Capacity (mAh) / Average Power Consumption of Craft (mA)
Batteries are rated by milliamperes hours (mAh). Therefore, determining the Battery Capacity number for our equation is rather simple. Determining the Average Power Consumption however, is difficult. Average power consumption will depend on how aggressively the operator flies the craft, the weight of the craft, the weather conditions, and a host of other factors. Google searches yielded no satisfying results for my motors / ESCs so I had to estimate. The ESCs were rated for a max of 30 Amps and there were four of them. I took a wild guess that each motor / ESC combo would be running at 25% of maximum output on average over the course of a flight. That means that our four motors / ESCs would draw a total 30A on average throughout a typical flight. The FCU and other electronics were negligible compared to power draw by the motors so I assumed them to be zero. Plugging back into our equation, I determined that I needed a battery with a capacity of 5000mAh to yield a ten minute flight time. Of course the accuracy of my result depends heavily on the accuracy of my Average Power Consumption estimate.

- 5000mAh Battery

As it turns out a 20C, 3S battery with a capacity of 5000mAh weights around 16 ounces. Rather than doing lift calculations based on unavailable data from manufacturers, I decided to determine the craft’s ability to lift the battery empirically. There are many build guides around the internet of DJI F450’s carrying 16 ounce cameras along with similar sized batteries. Logically, if a similar F450 could carry a similarly sized battery plus an additional 16 ounce camera, there should be no issues with weight. Ultimately, I decided to buy both a 4000mAh (11 ounces) and 5000mAh (16 ounces) battery from Amazon and try them both out. Both work great!
The 5000mAh battery provides about 15 minutes of flight time and a better hovering abilities than the lighter 4000mAh battery. It seems that the craft actually likes having the extra weight from the heavier battery when hovering. The 4000mAh battery provides closer to 12 minutes of flight time and the craft feels very sporty during flight due to its lighter weight. Using our flight time equation, we can back out the actual Average Power Consumption of my quadcopter: 20 Amperes!
Two more battery lingo notes:
Techies talk about 2S, 3S, 4S… batteries. The “S” stands for series. The more cells you stack in series the higher the output voltage of the battery will be. There is a great tutorial on battery topology here. The DJI F450 motors will tolerate a 3S or 4S battery voltage. I chose 3S because I already had a charger for a 3S battery and it made the UBEC circuit simpler (see UBEC section below).
Techies will also talk about 20C vs. 25C vs. 30C batteries. The “C number” tells the designer how fast a battery can safely be discharged. The formula to calculate the minimum discharge time is as follows:
Minimum Safe Discharge Time (hours) = 1 / C Number
According to our equation, a 20C battery provides a minimum safe discharge time of 3 minutes. If I will be flying for about ten minutes, a 20C battery should be sufficient and provide design margin.
5) UBEC
A UBEC is essentially a voltage converter and regulator. It converts unregulated voltage coming out of the battery to a constant five volts required to power control electronics (FCU, RF Receiver, and other accessories). Engineers call these circuits “voltage regulators”; RC hobbists call them BECs or UBECs. The important considerations in choosing a UBEC is ensuring that it can provide the required current to power all of your five volt electronics. On my quadcopter, I only plan on powering only my FCU / RF Receiver board off of five volts. In order to determine how much power my FCU was drawing, I hooked up an ammeter in series between the output of my bench top power supply and the five volt input pin of the FCU. When powering on the FCU, the ammeter read 100mA and then dropped closer to 50mA and held constant. Because the UBEC needs to provide sufficient power to the FCU at all times, it needs to handle the peak power needs of the FCU not just the average. Peak power demand tends to happen at start up–this is called “in rush”. Therefore, I need a UBEC that provides at least 100mA plus margin.

Focusing on cutting costs, I decided to adapt a pair of old car cell phone chargers for the job. Car power systems run on 12 volts and my quadcopter battery outputs nearly that. To the chargers, the quadcopter battery looks identical to the car battery and outputs 5 volts at sufficient current to power my FCU. I cut the two charges out of their plastic moldings, tested them and soldered them up. Originally, I used only one charger to power the FCU but found that the charger boards are not water resistant. When flying on wet grass, the charger board would occasionally die and cause a crash. Deciding that the power system was mission critical, I added a second circuit board as a back-up. This was done by diode ORing the two power supplies together then conformal coating the two boards with polyurethane spray to make them water resistant.
NOTE: There is a difference between a UBEC and BEC! The UBEC is what engineers call a “Switch Mode Power Supply (SMPS)”; a BEC is what engineers call a “linear voltage regulator”. The UBEC is highly efficient, minimizing heat and wasted battery draw. It is also considerably more complicated and can be electrically noisier than the BEC. The BEC provides very pure voltage output but is very inefficient. If you plan on using a BEC, ensure that you do heat load calculations to ensure that you don’t burn it up. Most electronics that will be powered from your UBEC / BEC will contain their own filtering. Thus, the noise issue of the UBEC will be minimized. I highly recommend using a UBEC over a BEC unless you have a specific reason not to.
In order to assembly your parts, you can follow one of many DJI Flamewheel F450 build guides online. A simple Google search will yield many great sites. I found that part selection was the hardest part and I hope this guide is useful.
What’s next for my F450:
1) Just enjoy flying with my son and the dog
2) Infared Night Flying with First Person Video and IR Illuminators
3) Camera face recognition with Raspberry Pi and openCV

Pingback: Quadcopter Mania | derekfalconer